DrCloudEHR provides electronic faxing capabilities through integration with InterFAX, a cloud-based fax service that enables you to securely and cost-effectively send and receive faxes.
You access the service through the Fax Center feature in DrCloudEHR, which allows you to manage incoming and outgoing faxes. You can fax files in the following formats: .jpg, .jpeg, .png, .pdf, .doc, and .docx.
When you receive an incoming fax, you select the patient it applies to, and attach it to the patient's documents. You can then download the faxed document as an Adobe PDF file.
This topic contains the following sections:
Add a Fax Number for a Facility or Program
You specify fax numbers at the facility or program level. This enables you to specify a unique fax number for each facility or program in your organizations.
- Click the Practice tab.
- On the left navigation menu, expand the Administrative tab, and then select Facilities.
- Select the facility.
- Click the Address tab.
- Enter the fax number, and then click Save.
Manage Incoming Faxes
View Incoming Faxes
The Fax Center displays incoming faxes for all facilities by default. To filter by facility, select the facility from the pulldown menu, and then click Search.
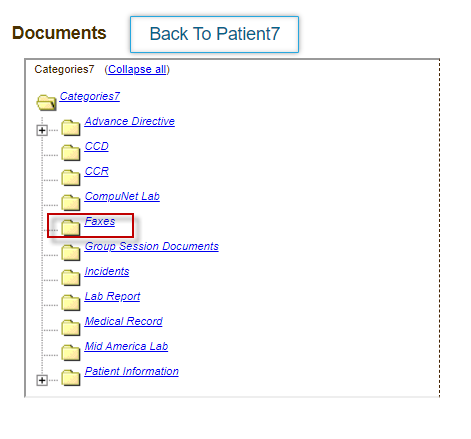
When you attach a fax to a patient, the application saves the fax as a PDF file to the patient's Documents > Faxes folder.
- Click the Practice tab.
- Click Administration in the left navigation bar, and then click Fax Center.
- Click the Incoming Faxes tab, which is displayed by default.
- Click Refresh to get the latest messages.
- Click the Preview Fax (magnifying glass) icon in the Action column to read the fax.
- Click the Select Patient field, and then search for the patient to attach the fax to.
- Select the checkbox for the fax, and then click the Attach button.
Access and Download a Faxed File
After you select a faxed file in the patient's Documents > Faxes folder, you can do the following:
- Download the faxed file to your computer as a PDF document.
- View notes associated with the fax.
- Change the file name.
- Move the file to a different document category folder in the folder tree.
- Move the file to another patient's documents folder.
- Tag the file to a specific encounter.
- Email the file to another user.
To access a file sent as a fax, do the following:
- Click the Patients tab, and then search for the patient for whom you want to download the file.
- Mouse over the Documents tab at the top of the Patient Summary Chart page, and then select Documents.
- Expand the Faxes folder in the tree.
- Click the PDF file.
- Perform the desired operation.
Manage Outgoing Faxes
Send a Fax
To send a fax,upload the document you want to send from your computer, and then fax it to the specified fax number.
- Click the Practice tab.
- Click Administration in the left navigation bar, and then click Fax Center.
- Click the Outgoing Faxes tab.
- Click Send Fax page opens.
- Provide the fax details. Fields marked with an asterisk are required.
- Click the Choose File button, and then select the file to fax.
- Click Send.
View Outgoing Faxes
After you send a fax, you can view the status in the Status column.
The Fax Center displays outgoing faxes for all facilities by default. To filter by facility, select the facility from the pulldown menu, and then click Search.
- Click the Practice tab.
- Click Administration in the left navigation bar, and then click Fax Center.
- Click the Outgoing Faxes tab.
- If the status for a fax reads Failure, click the Resend icon in the Action column to resend the fax.
Click the Refresh icon in the Action column to update the fax's status.


