You must add each patient seeking admittance to a facility or program as an applicant, and then approve and process the patient's application. You then admit the patient to the facility as a new resident.
If space is not available in the facility or program, you can add potential residents to a wait list. You can also transfer patients from a different treatment facility into your facility.
If you plan to submit UB-04 claims for inpatient services provided to a patient, run the UB-04 preprocessing task to enable billing. For more information, see Run the UB-04 Prepocessing Task for Inpatient Clients.
This topic contains the following sections:
Add a Patient as a Facility or Program Applicant
You must add each patient as an applicant to receive treatment at a facility or program, and then approve and process the client's application. You then admit the patient to the facility as a new resident.
Add Patient as an Applicant
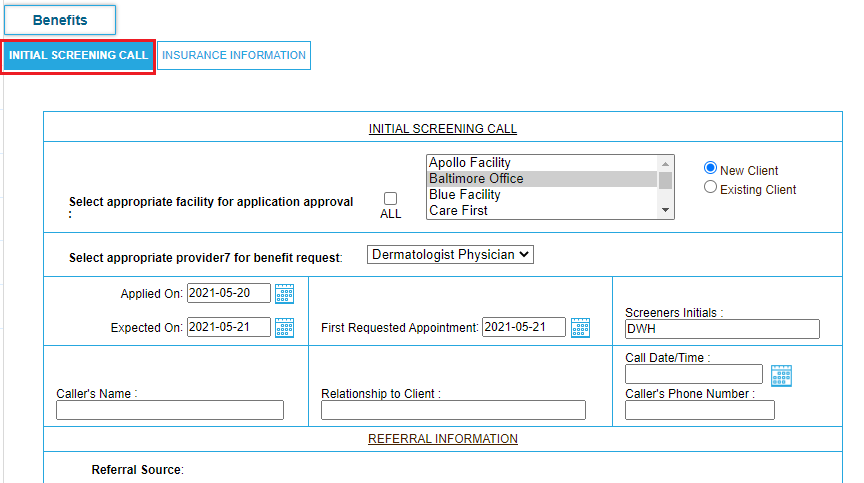
You can optionally click the Benefits button to check the benefits that are covered by insurance for a particular service the patient might receive.
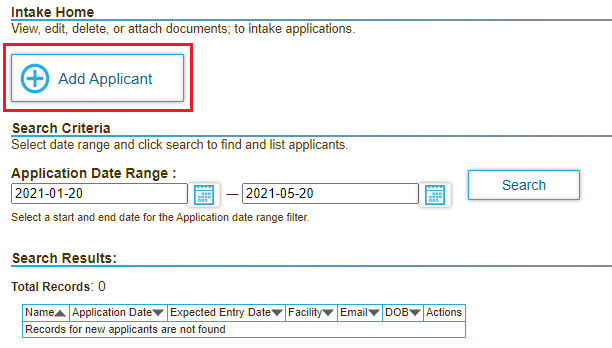
- Click the Applicants tab, and then click Add Applicant in the left-hand navigation bar. The List of Applicants page opens.
- Click the Add Applicant button. The Add Applicant page opens.
- Click the Initial Screening Call tab, and then enter the client's information.
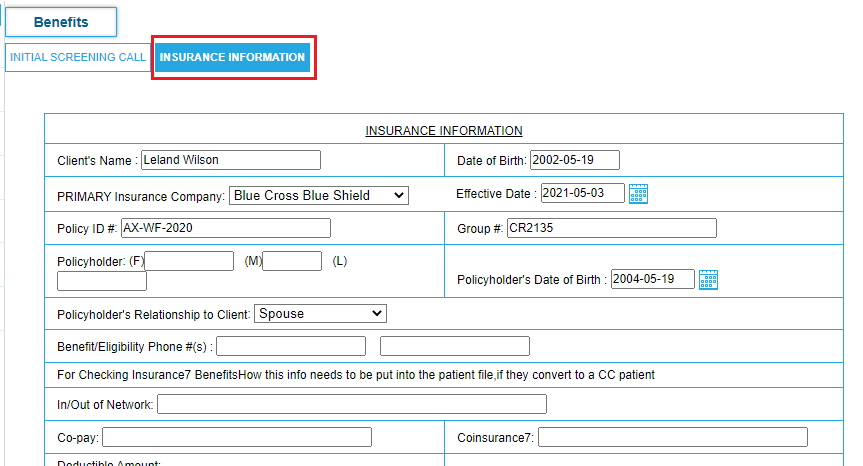
- Click the Insurance Information tab, and then enter the details for the client's primary and secondary insurance payers, if applicable.
- Click Save.
Approve and Process an Application
- Click the Applicants tab, and then click click Approve Applicants in the left-hand navigation bar.
- Search for the applicant that you want to approve. You can search for the applicant by typing the first three characters of the applicant's name and clicking Search.
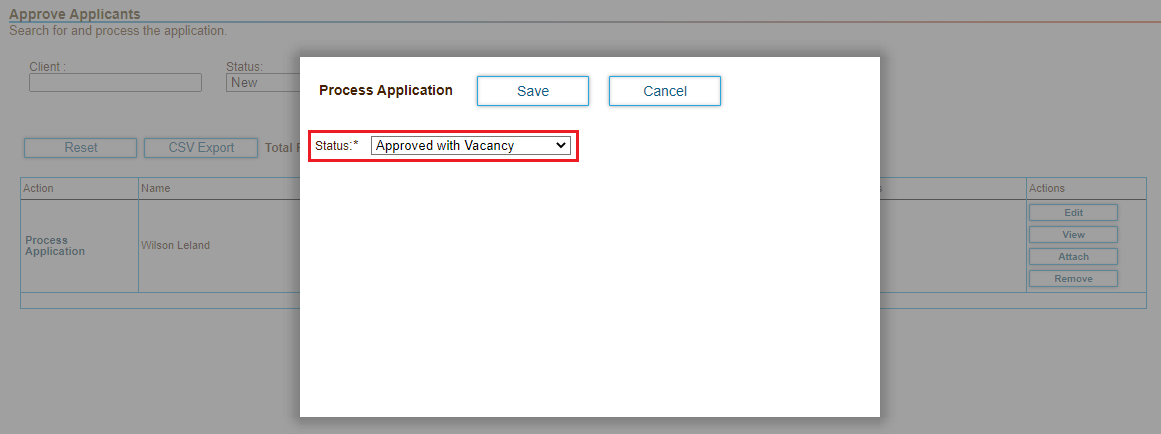
- Click the Process Application link in the Action column for the patient.
- In the Process Application dialog box, select the application status, and then click Save.
Add the Applicant as a New Resident
When an applicant becomes a resident, the following changes occur automatically:
- Residents are automatically admitted to the facility if a move-in date is present.
- The Level of Care is set to Independent Living (IL).
- The Billing Type is set to Independent Living (IL).
- In Billing Info, the Paper Statement option is set to No.
To add a new resident, complete the following steps:
- Click the Applicants tab.
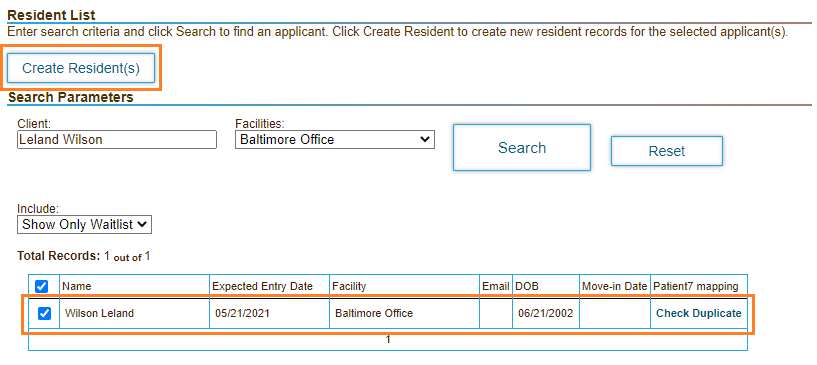
- On the left navigation menu, click Add New Resident. The Add New Resident page opens.
By default, the Show Only Waitlist filter is selected to display only waitlisted applicants. To show all applicants, select Show All. Residents who are accepted into the facility display in green. - Select the check box next to the resident that you want to add, and then click Create Resident.
You can verify that the resident was added by selecting the Show All filter. The resident should display in the list. - The Resident can be moved back to waiting list status clicking on Rollback Resident hyperlink.
Update the Wait List
After you process an application, you can add the applicant to the wait list.
- Click the Applicant tab.
- Click Wait List in the left hand navigation bar.
- To update an applicant, click the name of the applicant that you want to update.
- Update the information that you want to change, such as Approval Date, Move-in Date, or Move-in Facility.
- Click Update.
Admit a Resident
You can book a bed for a patient when you admit the patient to a residential facility or program. You can also add the patient to all or selected group sessions at admission.
- Click the Patients tab, and then search for the patient.
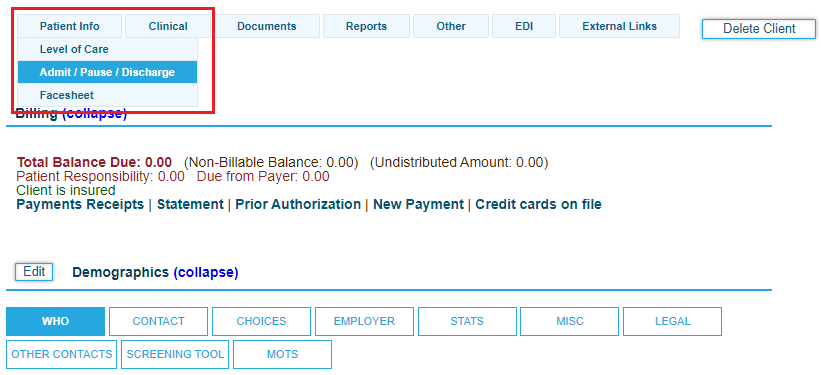
- Hover over the Patient Info tab at the top of the Patient Summary Chart page, and then click Admit/Pause/Discharge in the list.
- Click the New Admission button.
- Click Check Room Availability.
- Enter search criteria for available rooms by facility, building, floor, bed type, and date.
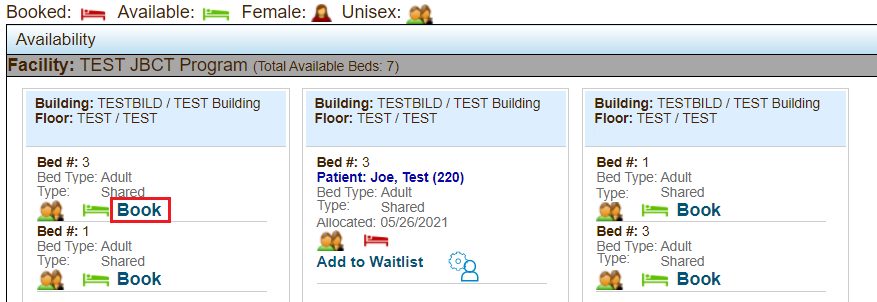
- Click Check to search for available rooms.
The page displays available rooms that match your criteria. - Click the Book link in the tile for a bed to book the bed.
- Fill in the admission details on the New Admission page.
Click the Add button next to the Admission Diagnosis menu to select from additional ICD-10 diagnosis codes. Note that you can add a medication when you save the diagnosis code addition. - Click Submit after you have filled in the necessary admission details..
Discharge a Resident
- Click the Patients tab, and then search for the patient.
- Hover over the Patient Info tab at the top of the Patient Summary Chart page, and then click Admit/Pause/Discharge in the list.
- Enter the discharge details, including the diagnosis-related group (DRG) code.
- Click Submit.
Transfer a Resident
Use the Transfer Resident function to transfer an applicant from another facility into your facility. When you transfer the resident, the resident is automatically admitted into your facility, and is discharged from the previous facility.
- Click the Applicants tab.
- Click Wait List in the left hand navigation bar, and then click Transfer Resident.
- Click the drop-down arrow to filter the lists by open or closed requests.
- Select the check box next to the resident you want to transfer.
- Click Transfer Resident(s).
