Page History
...
- Click the Patients tab, and then search for the patient for whom you want to transmit a file.
- On the Summary Chart page, mouse over the blue Reports tab at the top of the page, and then select Patient Reports.
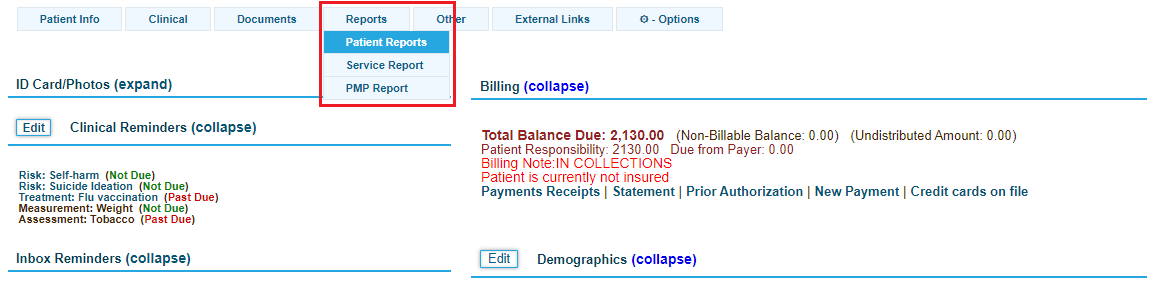
- Click the Transmit button for the file you want to send.
- Enter the phiMail address to send the file to in the Select Recipient field.
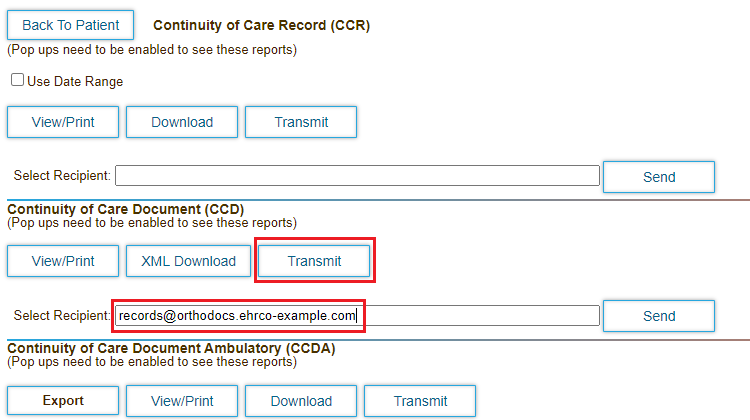
- Click Send. DrCloudEHR generates the file and sends it to the specified phiMail address.
...
You can import CCR, CCD, and CCDA files sent by other parties into DrCloudEHR. After
When you import a file, you can attach it to a , DrCloudEHR matches the file with the corresponding patient, and attaches it to the patient's chart. If the system cannot perform the match, you can do it manually.
- Click the Practice tab.
- Expand the Administrative tab, and then select Import Patient Records.
- Click the Received Files tab under patient records. Messages for the imported files appear in the list below.
- Click the checkbox for one or more messages, and then click the Import button. The imported files appear in the list below.Click

The application displays a message indicating a selected file was successfully matched with the corresponding patient.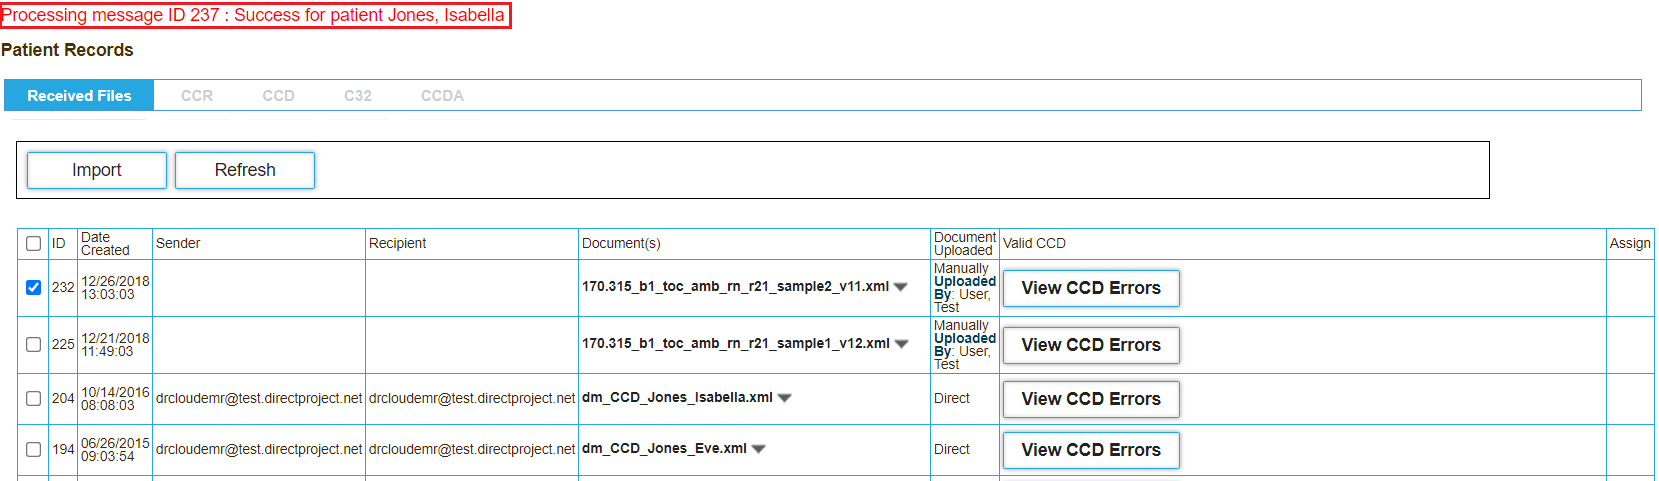
If the application fails to match a file with a patient, click the button in the Assign column for a recordthe file, and then select the patient to attach the file it to. (ASK HEMA)
Access Your phiMail Mailbox
...
Overview
Content Tools
Activity