Page History
...
- Click the Patients tab.
- Click Patient Search/Add in the left hand navigation bar, and then search for the patient.
- Click Multidisciplinary Treatment Plan in the left hand navigation bar. The Multidisciplinary List page displays existing plans for the patient.
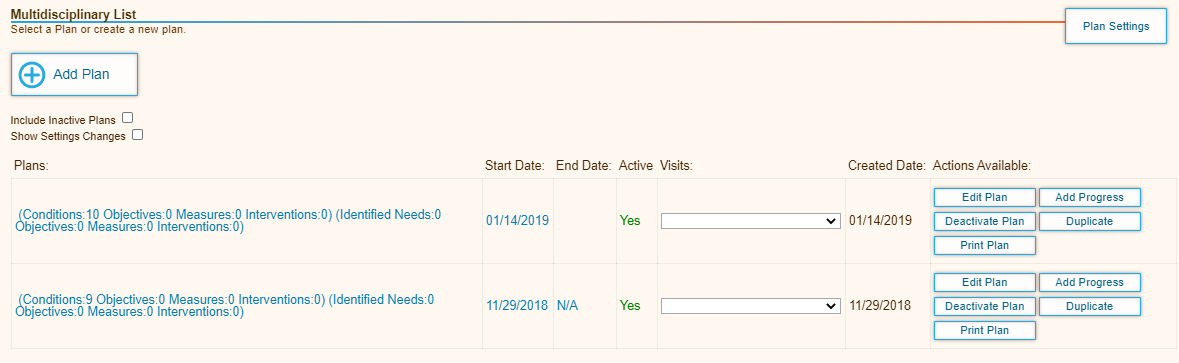
- Click Add Plan.
- Enter the plan header information.
- Name for Plan: Select the plan name from the list.
- Start Date: Select the start date for the plan.
- End Date: Select the end date for the plan.
- Date Last Reviewed: Enter the last review date if you are modifying an existing plan. Not applicable if you are creating a report.
- Select the care providers who are required to sign off on the treatment plan from the Available Providers field.
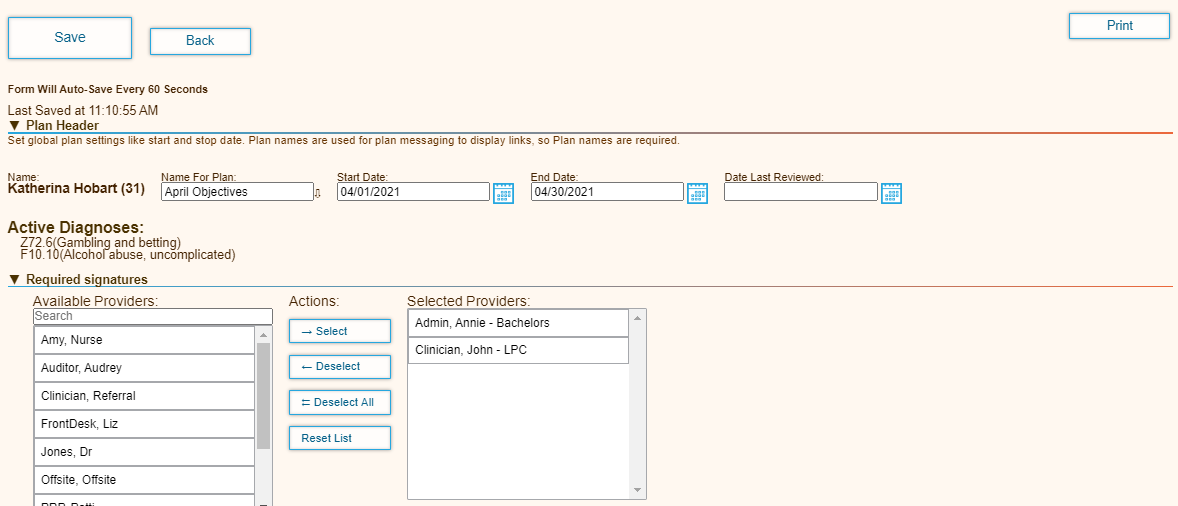
- Optionally enter the recovery goals, if any.
- Click Add Condition. Click a button to add the corresponding diagnosis code. The code and title are added to the page.
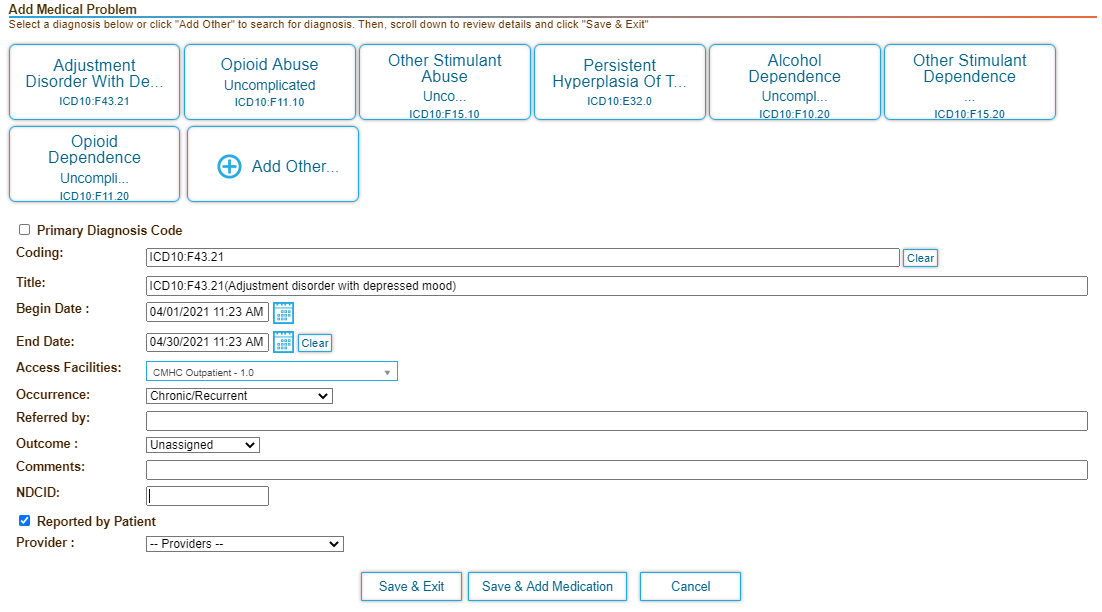
- Enter any additional required information in the Add Medical Problem page.
- Click Save & Exit when finished. The condition is added to the Condition List.
Note that you can optionally click Save & Add Medication to add a medication for the condition.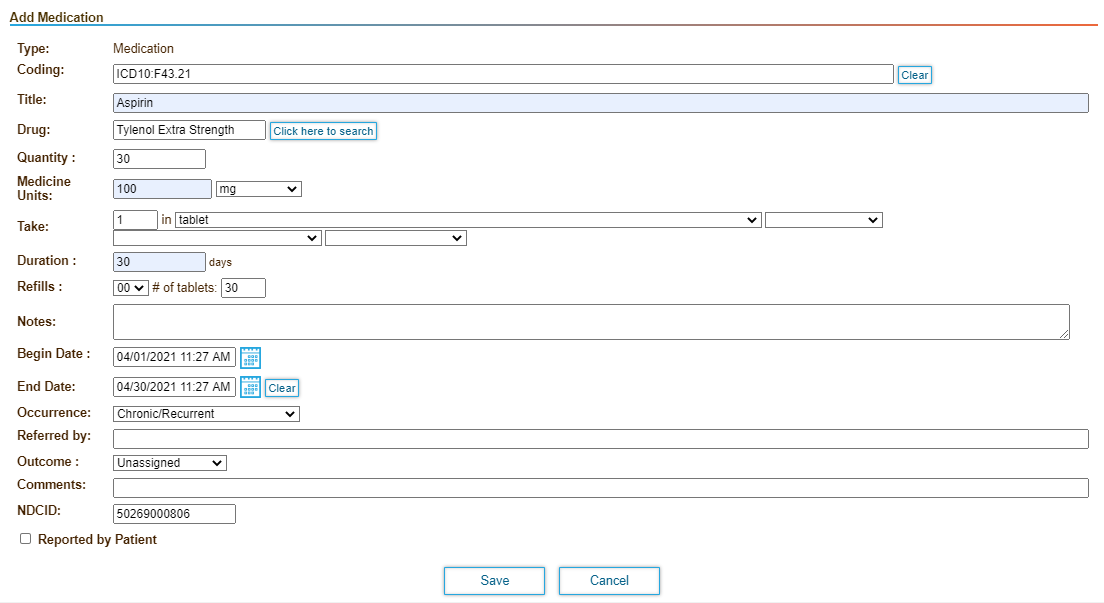
- Click Add Identified Need.
- Search for the service code that corresponds to the need.
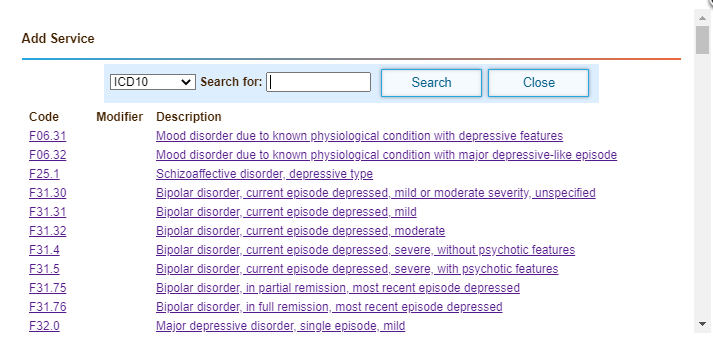
- Select the code. The code and title are added to the page.
- Select a minimum of 3 strengths.
- Select a minimum of 3 weaknesses.
- Enter any cultural issues, preferences, or any other concerns for the patient.
- Select the recommended initial discharge plan.
- Select the criteria the patient must meet for discharge.
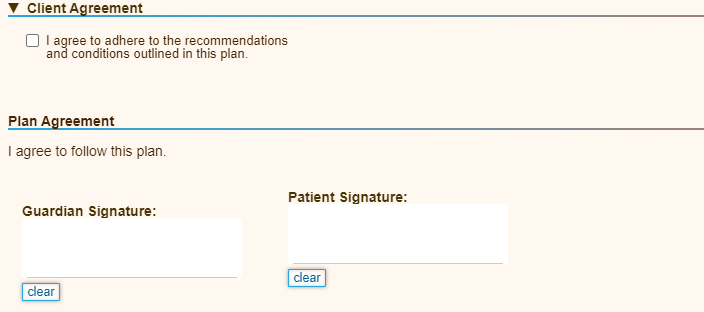
- Select the applicable client agreement.
- Select the checkbox to accept the agreement if the patient is covered under Medicaid Title XIX/XXI and/or Serious Mental Illness (SMI).
- Enter the patient and guardian signatures, if applicable.
- Save the form and view the signature of the selected providers. The selected providers receive a reminder about the assigned plan.
- Click Save to save the plan.
...
- Click the Patients tab.
- Click Patient Search/Add in the left hand navigation bar, and then search for the patient.
- Select the encounter to associate with the plan.
- Click the New Encounter link next to the patient's name to create a new encounter.
- Select an open encounter from the Encounter History menu.
- Click Multidisciplinary Treatment Plan in the left hand navigation bar.
The page displays a list of existing plans. - Click the Add Progress button for the plan you want to update.
- Select the link for a form to include in the update under Form To Include in Progress. The selected form opens in a popup window.
- Fill in the form, and then click Save.
Configuring Plan Settings
You can configure settings to apply to plans. You can also specify forms to include in plan progress notes.
You must have the MDTP Administrator ACL assigned to configure plan settings.
- Click the Patients tab, and then select a patient.
- Click the Treatment Plan tab in the left navigation bar.
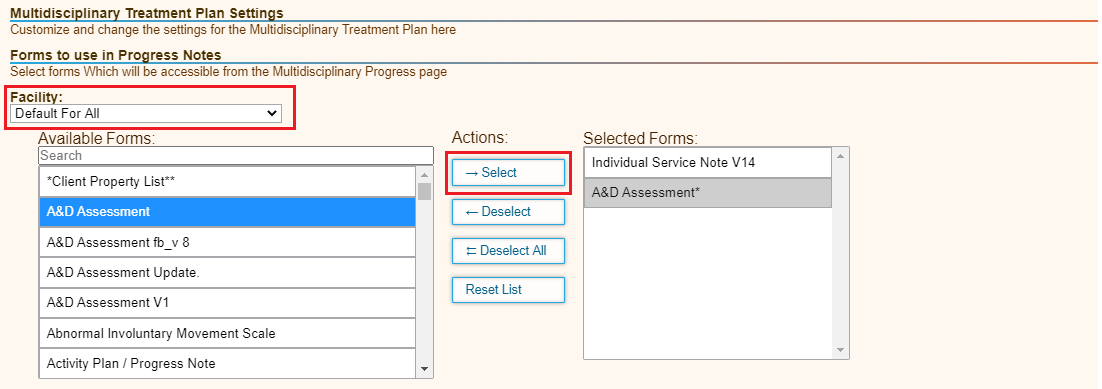
- Click the Plan Settings button in the upper right of the page.

- Move the forms you want to include in program notes into the right side of the table. You can add forms for selected facilities, or you can add the forms to all facilities.
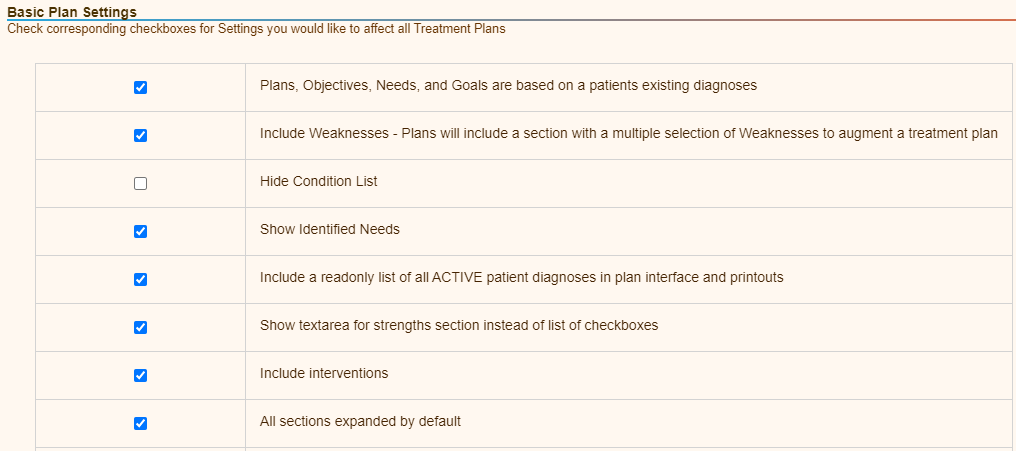
- Select the settings to apply to all plans in the system.
- Add acknowledgement text that you want to add above the signature boxes.
- Click the Agreement button, and then add a checkbox or radio button with agreement text. The agreement selections are added to the bottom of the plan.
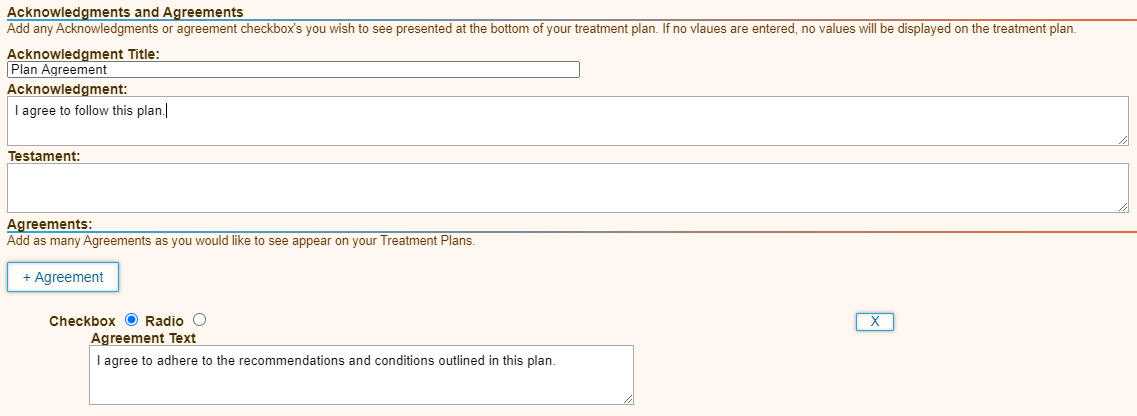
- Click Save. The plan acknowledgement and client agreement items are displayed at the bottom of the plan.
Overview
Content Tools
Activity