Page History
...
- Click the Practice tab.
- On the left navigation menu, click the Administrative tab, and then select Facilities.
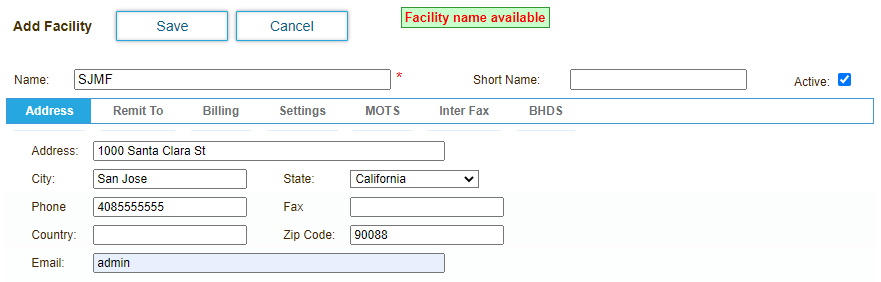
- Click Add. The Add Facility dialog box opens.
- Click the Address and Remit To tabs and enter the necessary details.
- Click the Additional Info tab and provide relevant business details.
- If the facility is a Medicare Administrative Contractor (MAC), enter the Provider Transaction Access Number (PTAN) in the Medicare PTAN field..
- If the facility uses taxonomy codes used to identify the provider specialty at the claim level, enter the 10 character alphanumeric code.
- Click the Settings tab and provide the billing details.
- If the facility is the billing location, select the Accepts Assignments check box. If the box is not selected, electronic signatures are not set in Box 13 in HCFA forms submitted electronically.
- Enter contact details for the primary billing contact for the facility.
- If the facility provides psychiatric rehabilitation program (PRP) services, select Psychiatric Rehabilitation as the Program Type. The application displays the facility in the PRP Facility menu options on the Compile PRP Program page.
- Click Save to save the facility.
...
- Click the Practice tab.
- On the left navigation menu, click the Administrative tab, and then select Forms Workflow.
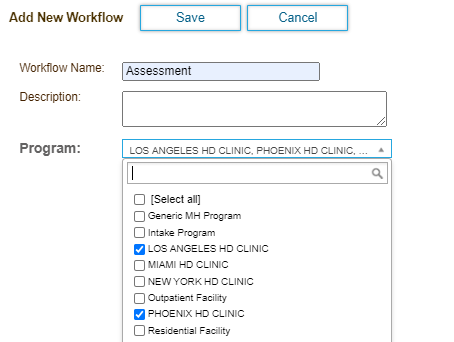
- Click Add New Workflow button. The Add New Workflow dialog box opens.
- Enter a name and optional description for the workflow.
- Select each program or facility where the appointments occur.
- Select the the Show at Forms Cabinet checkbox to include the forms in the Forms Cabinet.
- Click Save. The new workflow appears in the table on the Forms Workflow page.
- Locate the workflow in the table, and then click the Forms link in the Add Forms column.

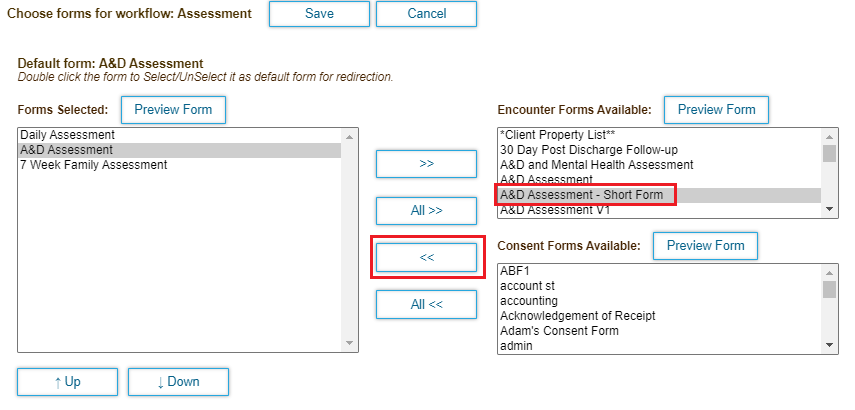
- Select the forms to include, then use the arrow buttons to move the forms into the Forms Selected window.
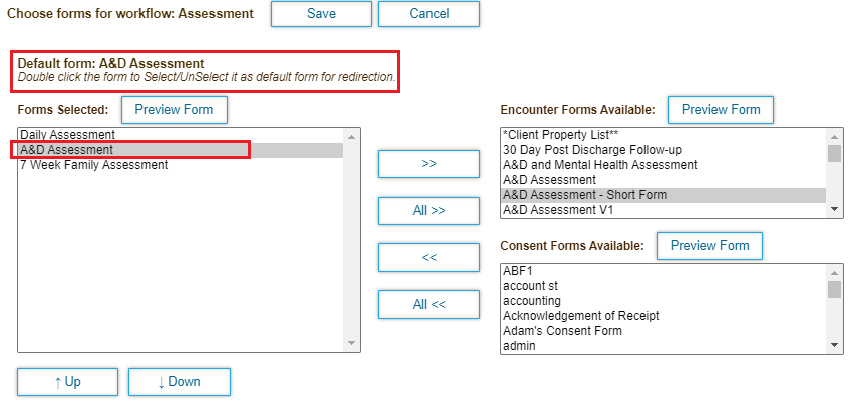
- Use the Up and Down keys to specify the order in which forms appear in the encounter summary page.
- Enter the order in which the workflow appears in the Forms Cabinet in the Priority field. Set the value to 0 to have the workflow display first in the list.
- Optionally double-click a form to make it the default that is displayed when a user opens or saves an encounter.
| Anchor | ||||
|---|---|---|---|---|
|
A category is a template used for a specific encounter or appointment type. The category contains codes, facilities, providers, and workflows specific to the encounter.
When a new encounter is created, the provider selects the category to use. Dependent on data already defined in the system, such as service codes, facilities, and workflows.
When a user schedules a new appointment in the calendar, they also select the category.
- Click the the Practice tab tab.
- On the left navigation menu, click the Administrative tab, and then select Categories.
- Click Add.

- Select the checkbox indicating payment type.
- Enter a name and description that map to the encounter type.
- Indicate whether the category applies to patients, providers, or a group of patients that receive the same service.
- Click the Click to choose the code code link to select service codes and and modifiers defined in the system to associate with the category. You can select multiple codes.
If you add codes manually, format codes as type:number-modifier.
For example: CPT4:90834-HF. Separate each code with a comma.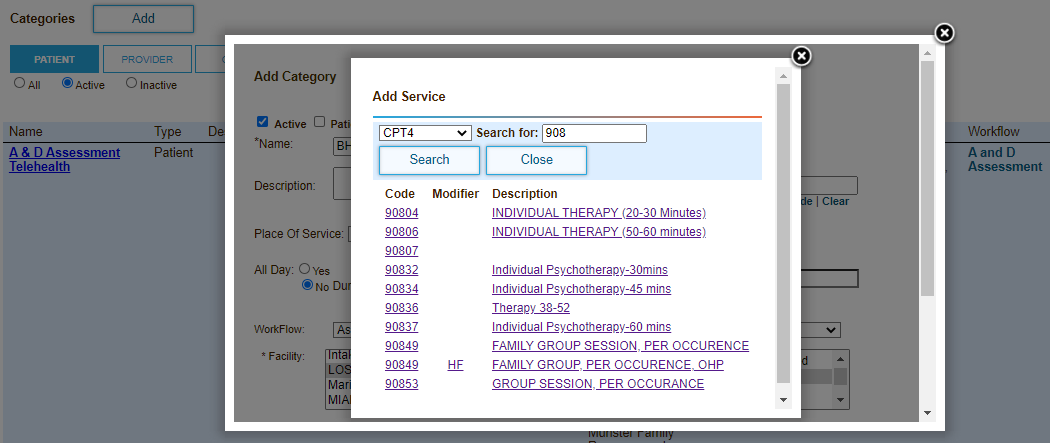
- Select the Place of Service (POS) where services are provided.
- Specify the typical duration of appointments of this type.
This data is useful when scheduling appointments in the calendar.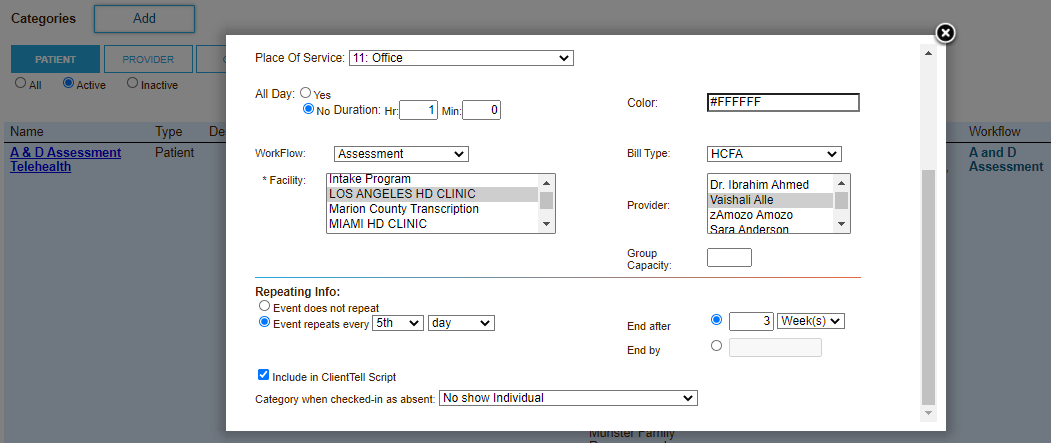
- Optionally specify the color to use the color to display in the calendar for this type of appointment.
- Select the workflow that contains encounter forms typically used for this encounter type.
- Select the facility and a list of providers associated with the encounter type.
- Optionally indicate how often the encounter repeats.
Note that it is advisable to not set this property, but instead schedule appointments as needed in the calendar. - Optionally click the Include in ClientTell Script to send appointment reminders to patients when appointments that use the category are created.
- Optionally select the category to use when a patient fails to show for an appointment.
- Click Save to save the category.
...
Overview
Content Tools
Activity